

Introduction
No matter the type of online store you have, at some point you will want to organise your various products into similar groupings as this will help potential customers to find what they are looking for much easier. Whether you want to group your products by brand, size, type, or even location the best way to achieve this inside eZo is by using the Categories function.
eZo lets users Create Categories and Assign Products to their relevant categories with ease and in this guide we will explore both of these functionalities so that you can use Categories to great effect in your own store.
-
1. Creating Category Groups
2. Assigning Products To Category Groups
1. Creating Category Groups
The first step to using Categories is to Create the Category structure you want to use in your store.
Creating Categories
There are two ways to Create Products inside eZo:
- i) Create category groups manually; or
ii) Import the category structure directly into your eZo portal
i) Creating Categories Manually
If you have only a small number of products and categories in your store it may be easier to build the category structure manually. To explain how to do this in detail we have outlined each of the steps involved below:
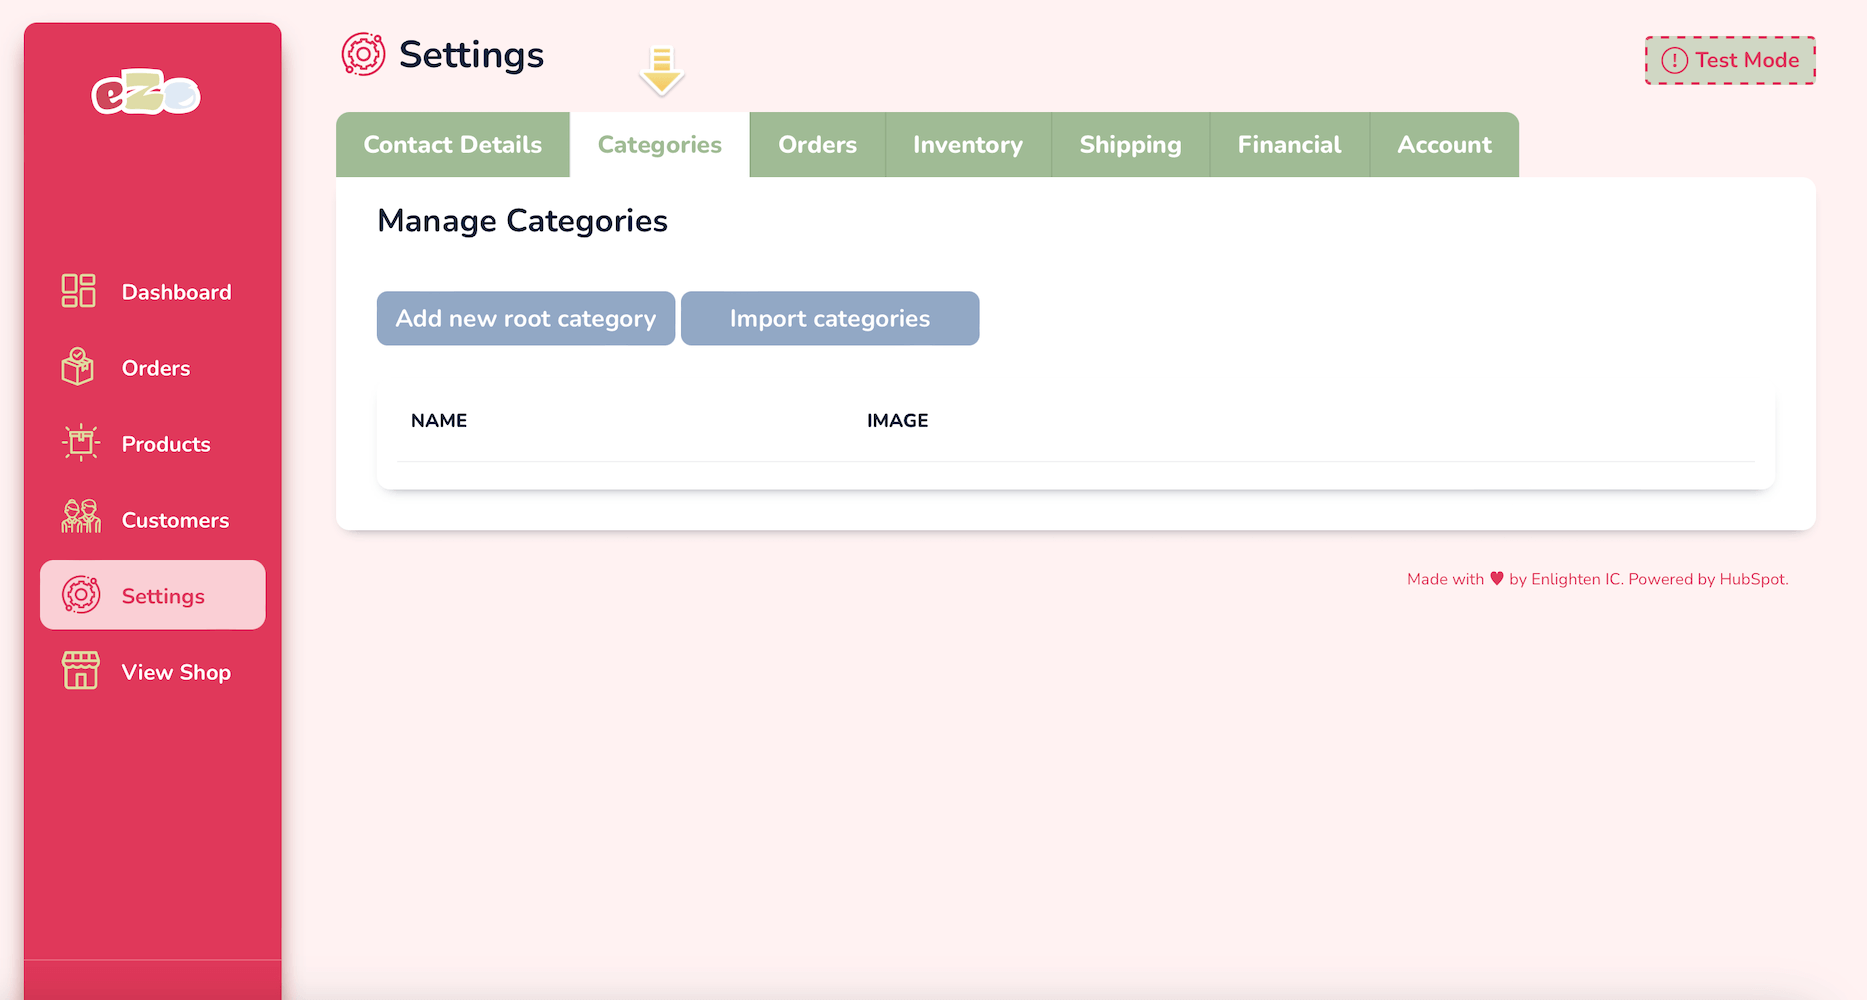
Visit The Categories Section Inside Your eZo portal
To reach the Categories section, please click on Settings and then on the Categories tab.
1. Add Parent Categories
We always advise users that Categories work best when you map everything out on paper (or a spreadsheet) first. In this example we have added "Industrial Goods" as our first Root Category.
To Add A Root-Level Category:
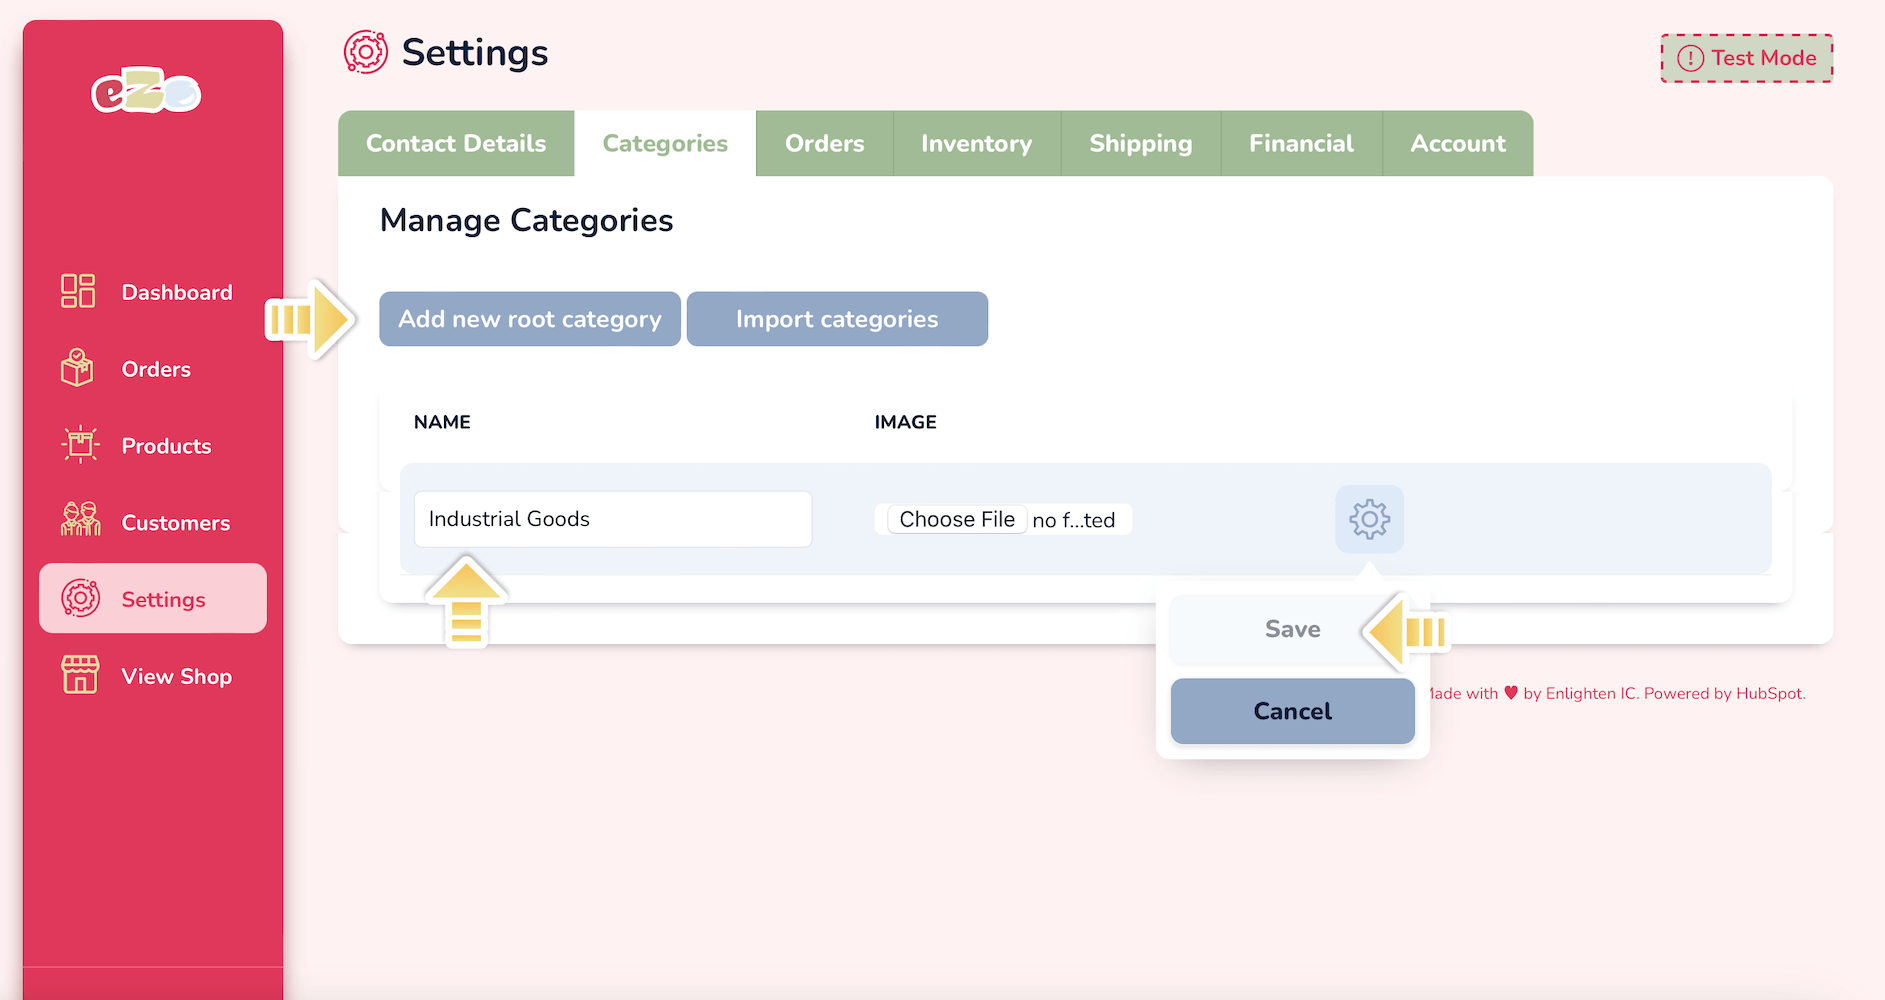
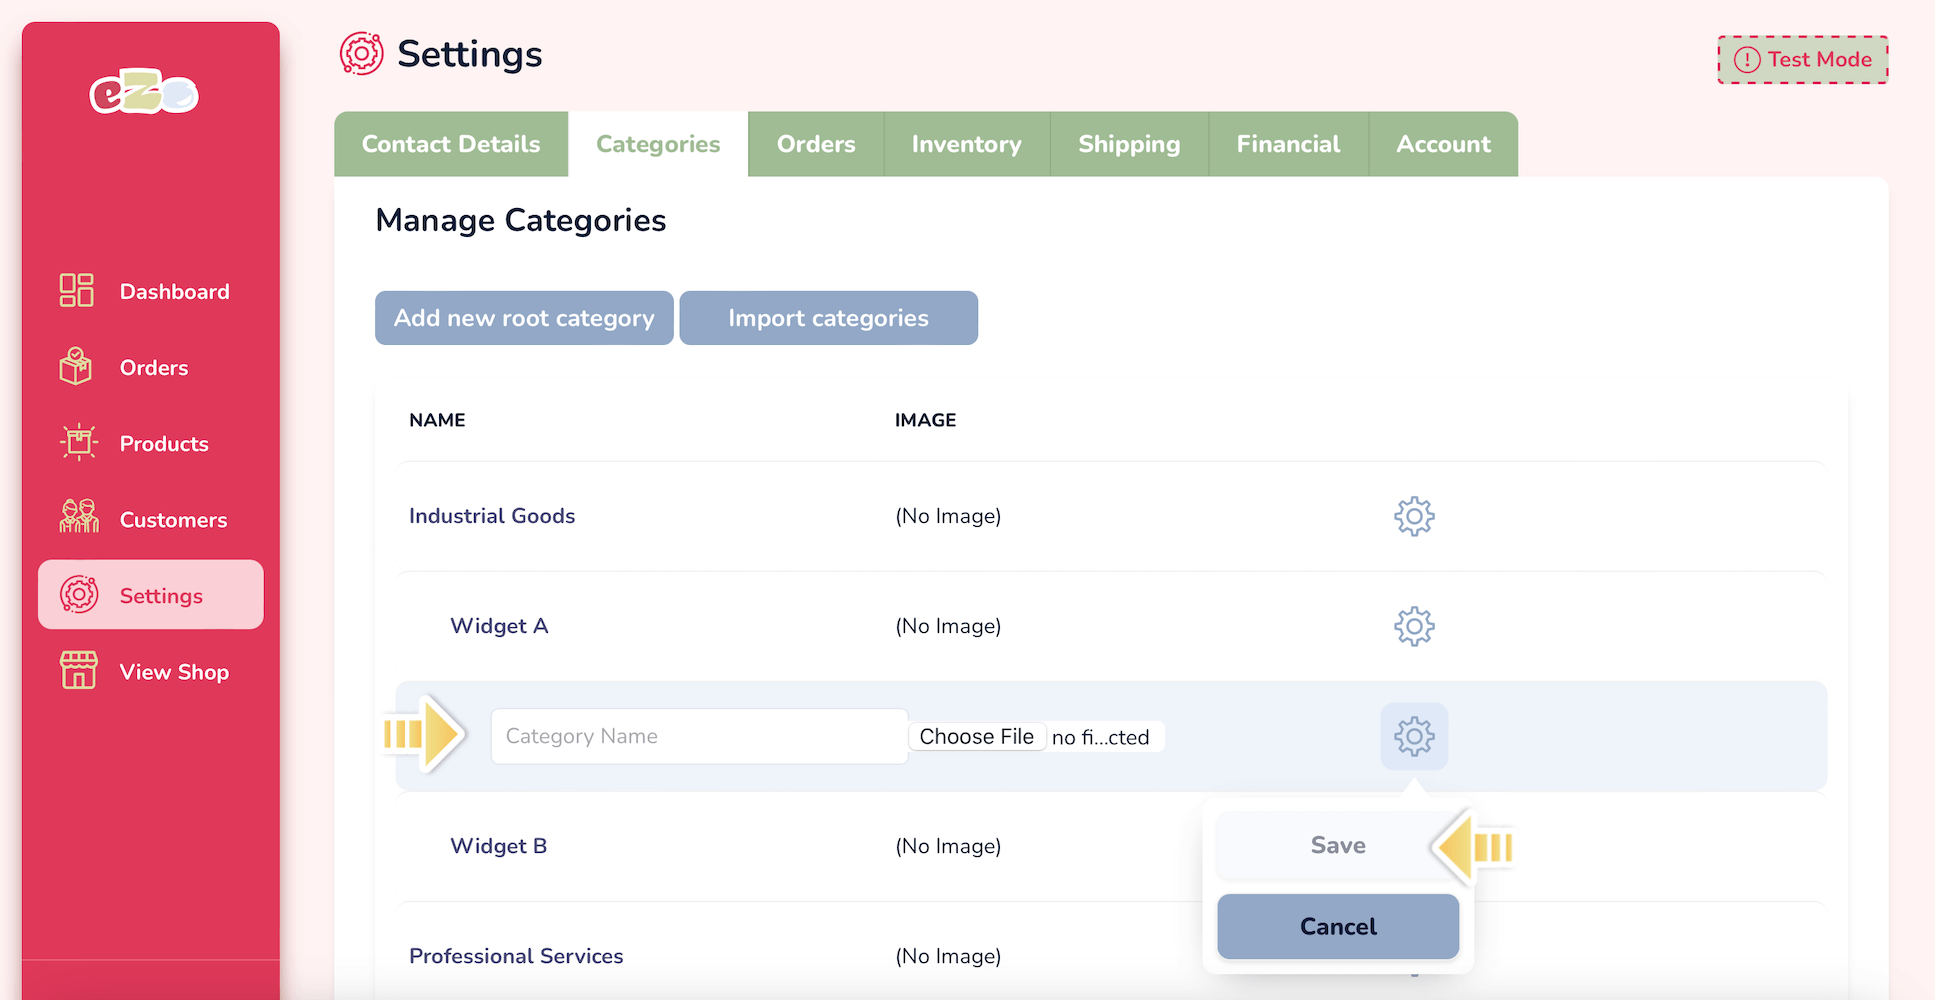
- • Click on the large blue button called, “Add New Root Category”.
• A new Input box will appear allowing you to type the Root Category name. You may also click to upload an image for this category group.
• Once you have entered the Root Category’s name click on the Cog icon and then Save.
If you would like to re-word or amend the Root Category name simply click the Cog again and then ‘Edit’. This will re-open the Input box and you can make any changes you wish. Just remember to click Save when you’re finished.
2. Add A Child Category
Your store will most probably have different levels of categories. At eZo we call these ‘Children’ so once you have set up your Root Category all you have to do is add each Child category beneath the relevant Root Category.
To add Child Categories:
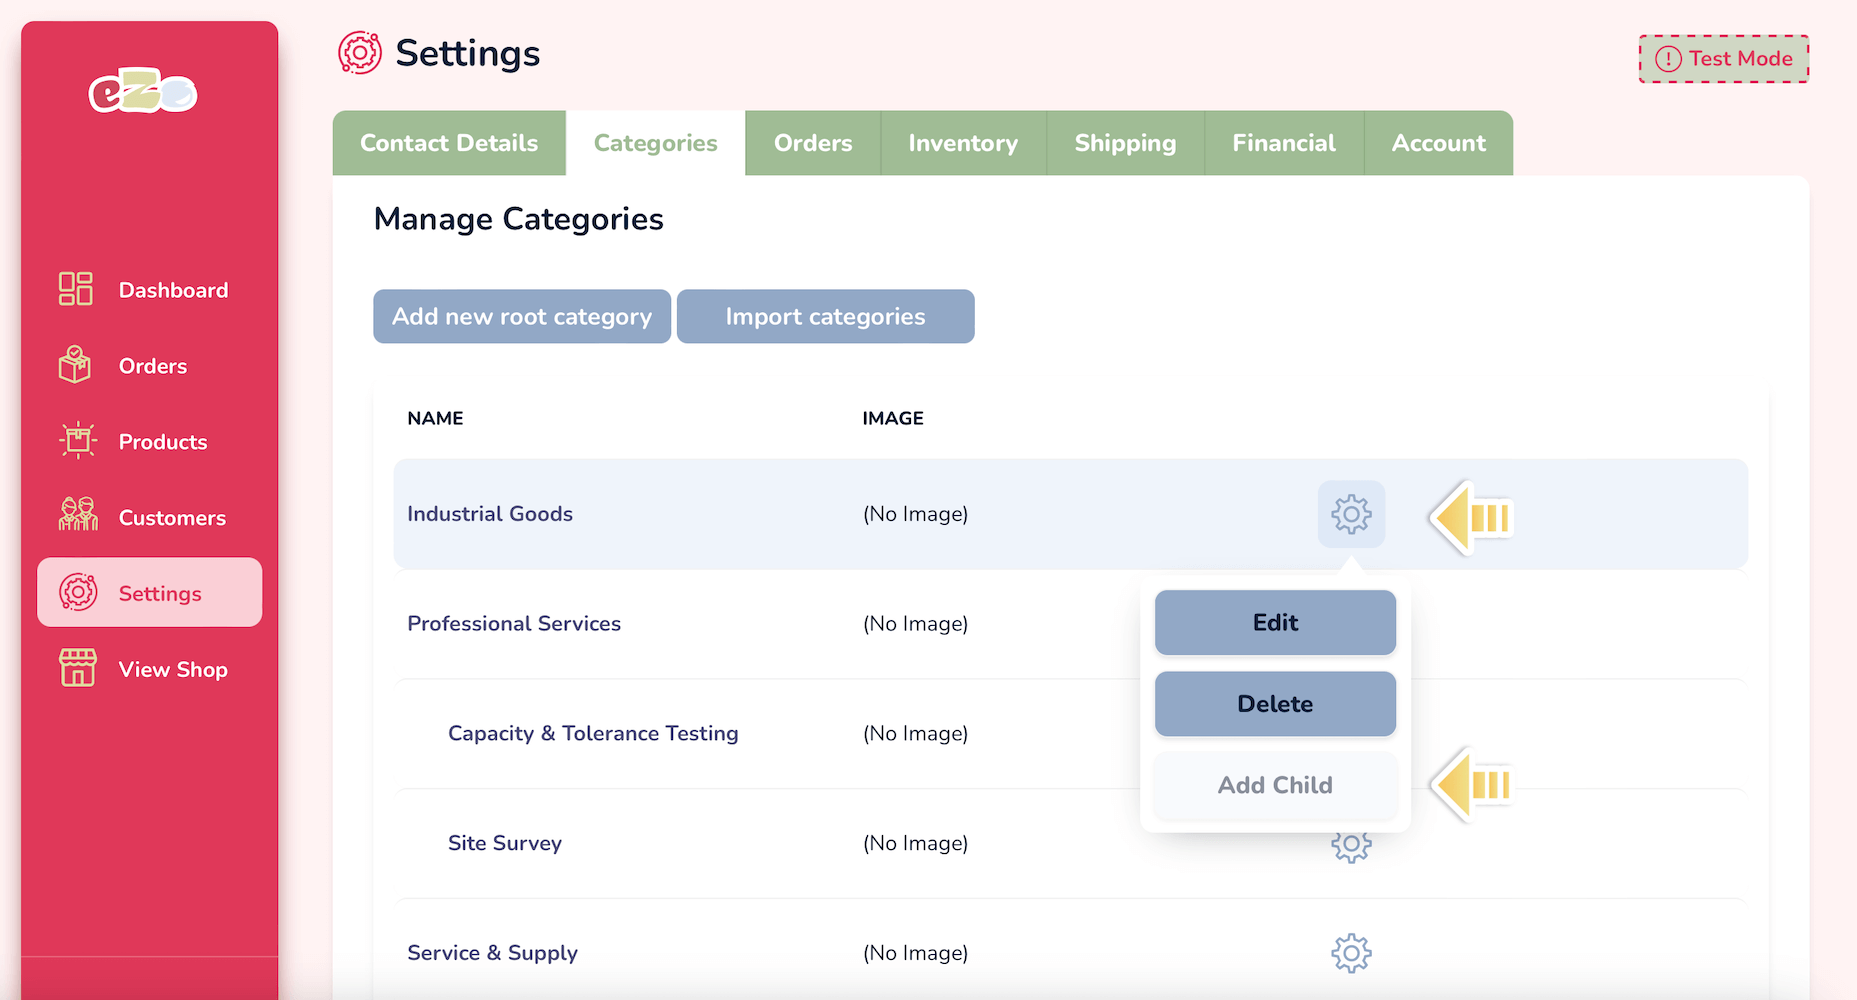
- • Click on the Cog icon beside the relevant Root Category and click “Add Child”
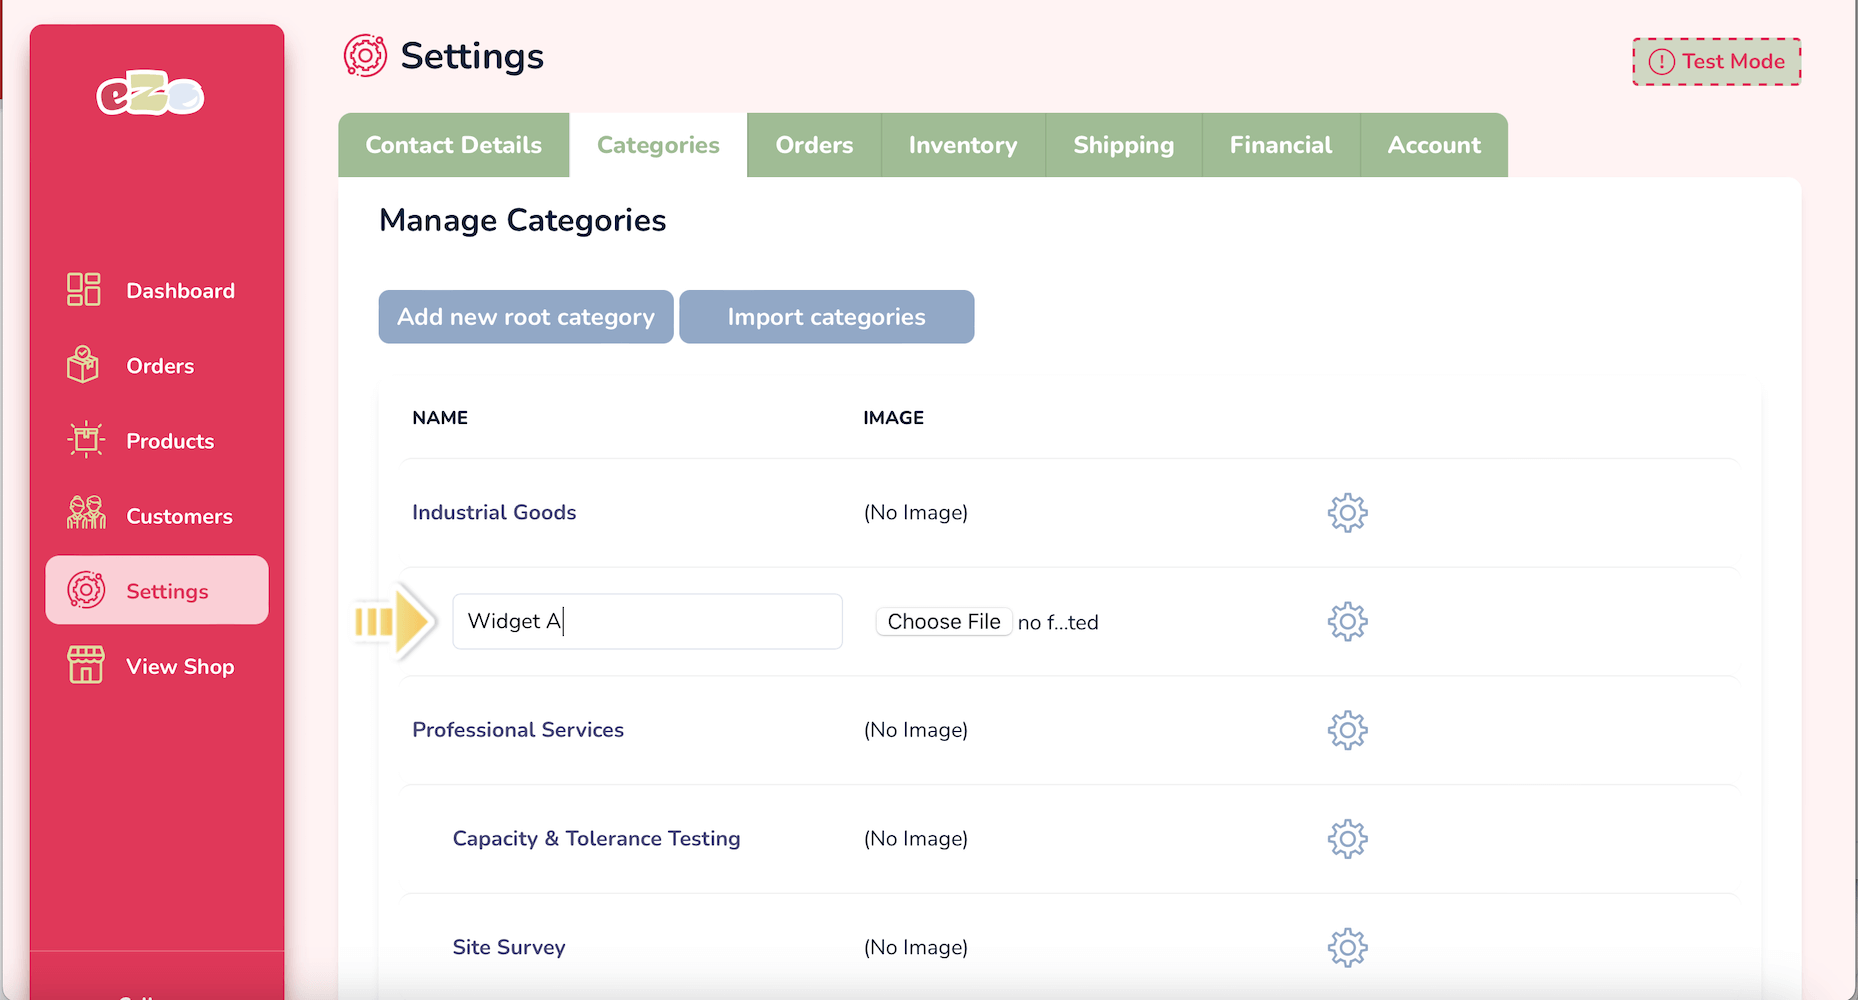
• When you do this another Input box will appear and you can enter the name of the Child Category.
• Remember to click the Cog and Save your entry.
3. Rinse & Repeat
Simply repeat these steps to build out the Category structure for your store. It is also worth noting that with eZo you can have multi-level categories so if your Child Categories have Children, simply go through the same process and add the new sub-categories to the child category as per the example below.
ii) Importing Category Structure Directly Into eZo
For many companies their Category taxonomy will be quite extensive and adding each Category manually would take a lot of time. In this regard, eZo also allows users to import their Category structure directly into eZo by uploading a CSV file.
Preparing the Category Import spreadsheet
To avoid potential errors/ conflicts it is very important to map out the Categories structure accurately in advance. To assist users in this regard we have prepared an Import Template you which you can find here.
In the example below there are three columns:
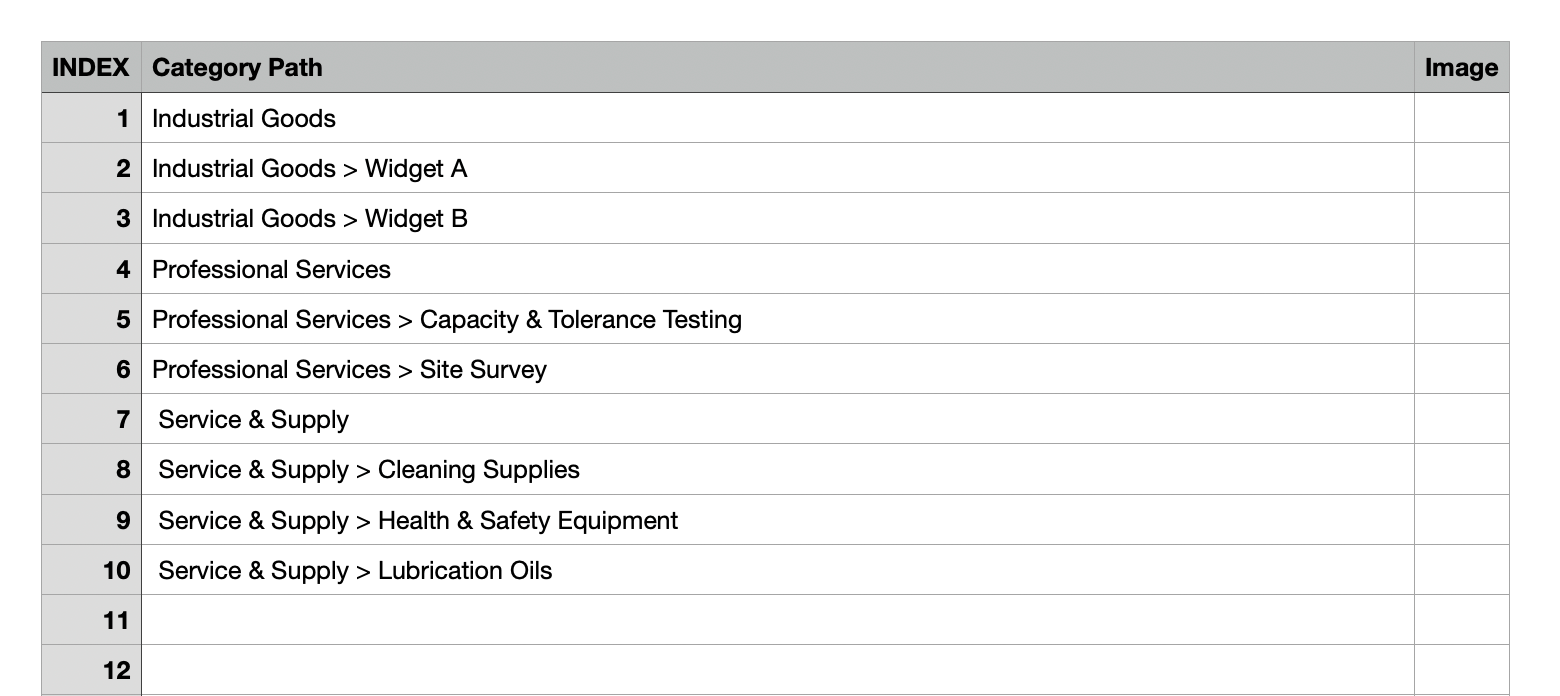
- • Index
The ‘Index’ column is not used by eZo and is simply there to aid you as you build your import spreadsheet.
• Category Path
The main field you will use is the ‘Category Path’. The key to using the Category Path is that each child category is separated from its parent category with a “>”. To add a Root Category simply add the Root Category Name in the column, however, when adding a child of this Root category you will need to add a “>” and then the Child Category name.
You can also add more and more child categories in the following format “Root > Child 1 > Child 2 > Child 3”, however, as can be seen in the example below you need to ensure that the Root/Parent Categories exist in their own right as well (see rows 1, 4 and 7).
• Image
To attach a Category image simply add the URL of where the image is currently hosted and it will be imported into the eZo folder in your HubSpot filestore. NB Category images are not currently exposed in the eZo Essentials theme. This is coming soon.
Importing The Category Spreadsheet
Once the category spreadsheet has been prepared it is time to upload the categories to eZo. This is quite a simple process although depending on how many categories are being uploaded it may take some time for the HubSpot API to complete the process.
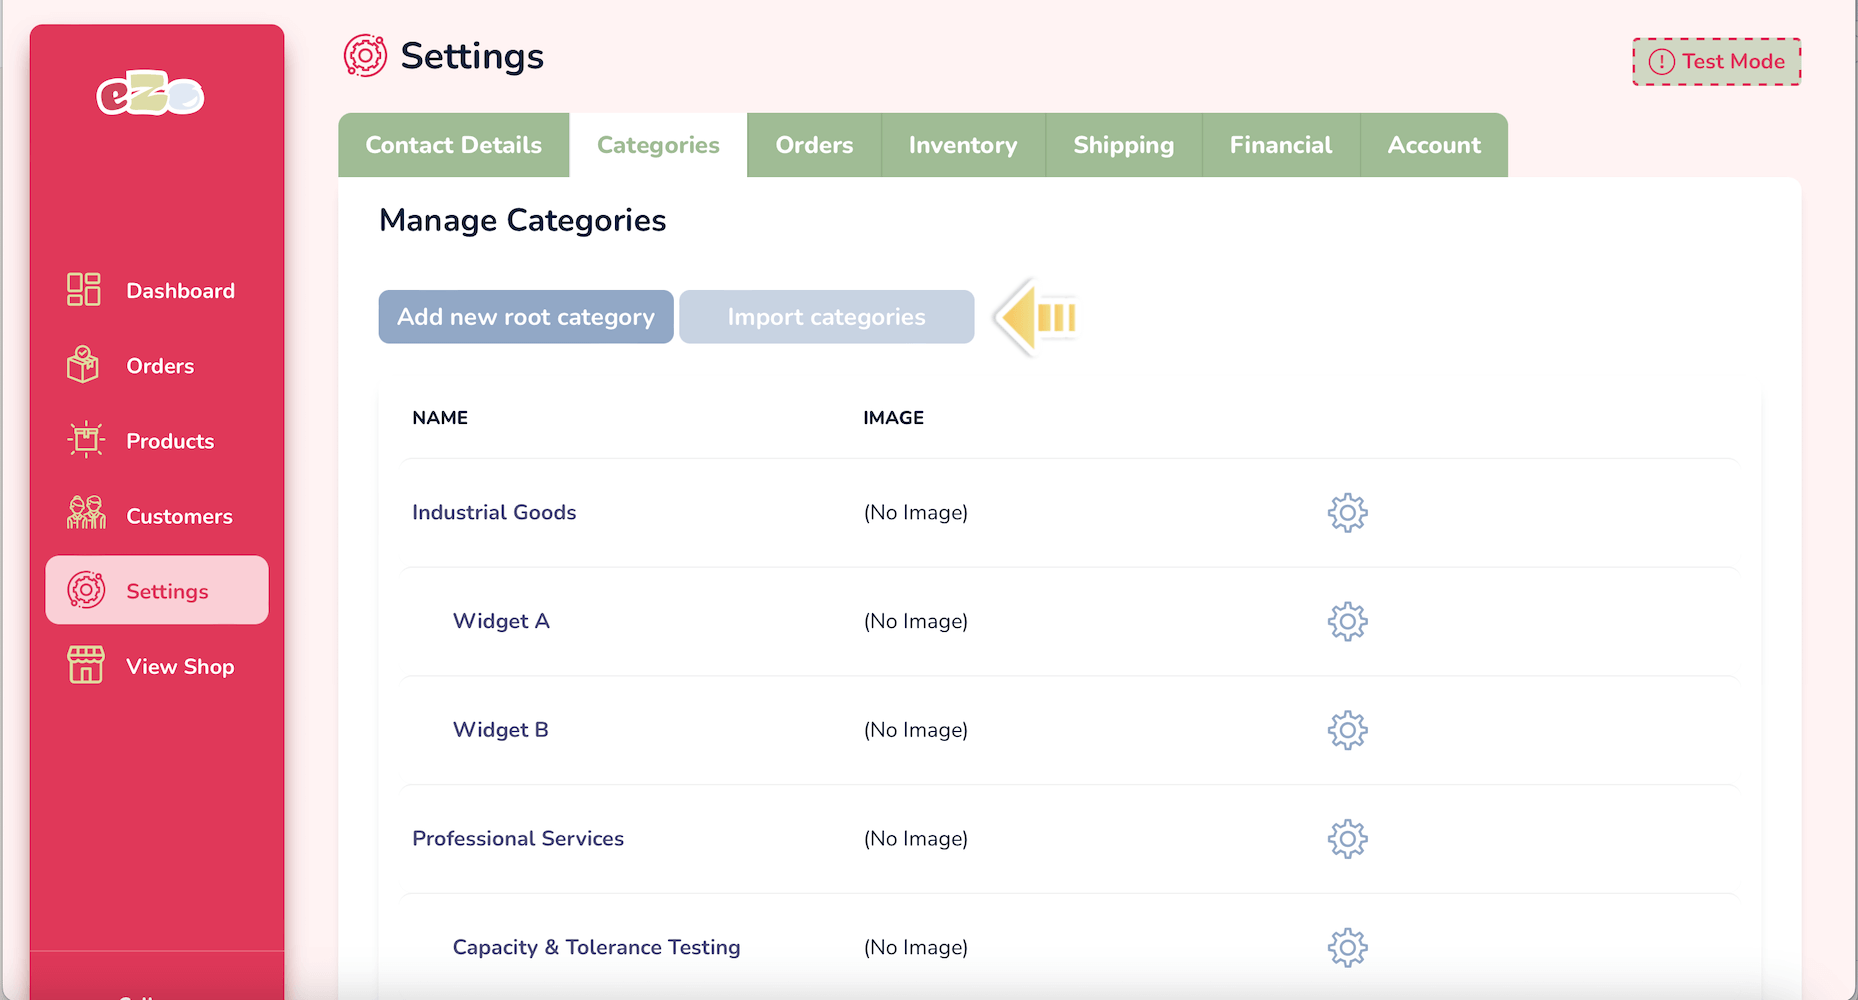
• Click on the Import Categories button highlighted below
• Select & Upload Your Category CSV file
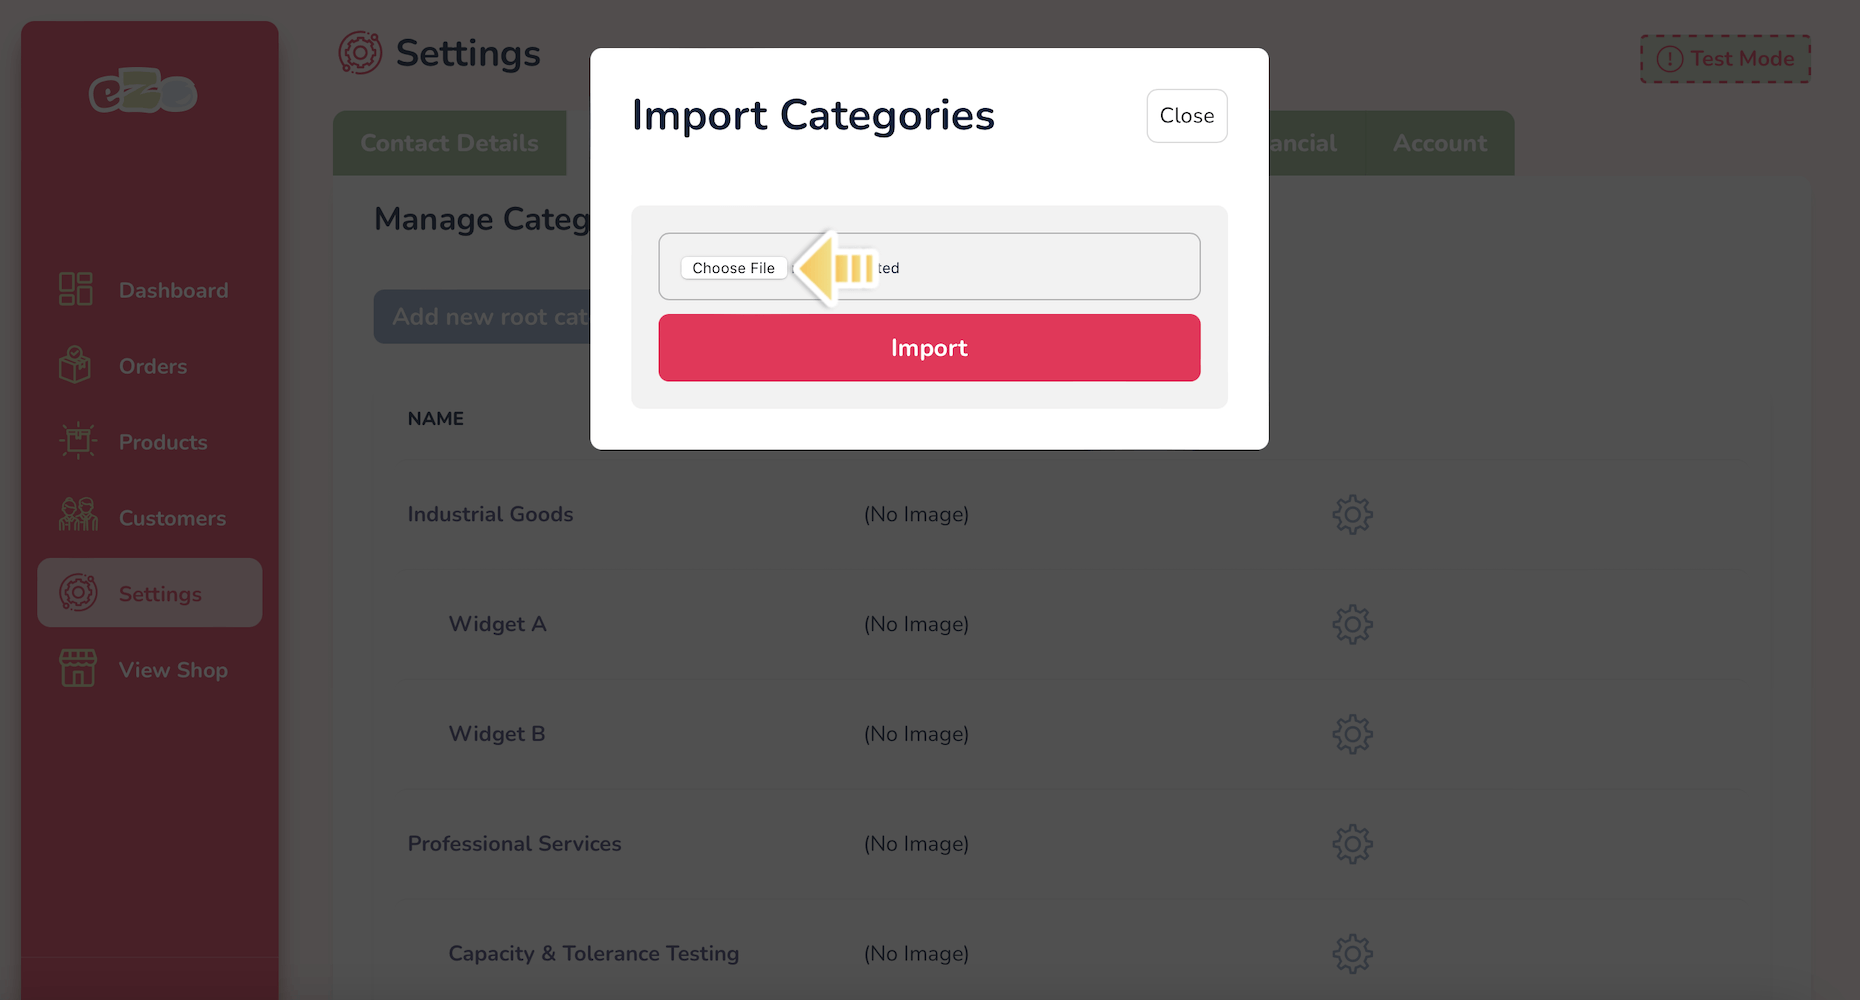
When you click to Import Categories a Popup will appear inviting you to ‘Choose a File’. This will allow you to select the CSV file from your computer and then click the ‘Import’ button to import the Category Taxonomy into eZo.
Please note: depending on how many categories you have on your spreadsheet this process may take a long time. We would suggest letting it run for several minutes to let it complete and before navigating away or refreshing your browser.
Once you have uploaded the category spreadsheet you will see them displayed on the Categories page where you can add more, edit or delete them.
All you need to do now is Assign the various Products to each Category group which is covered in the next section below.
Important Considerations When Importing Categories
- • Always set up Categories (manual or import) before Assigning Products as it stands to reason that you cannot assign a product to a category group if the category doesn’t exist in the first place. This may seem obvious but it is easy to put the cart before the horse and then wonder why it didnt work.
• If you are making major changes to your Category Taxonomy it may be prudent to delete all categories, upload the newer version of your category structure and then upload a new Product Import spreadsheet to re-assign your products to these new Categories.
• If uploading a large number of categories the HubSpot API may be quite slow and you may need to wait for a short period before the new categories appear.
2. Assigning Categories
Once Category groups have been created and Products set up inside eZo, it is now time to decide which products will belong to which category. This is the process of “Assigning Products to a Category group” and can be achieved using two methods inside eZo:
- i) Assign Products Manually; or
ii) Assign Products Via Upload.
Assigning Products Manually
To assign an individual product to a category, please follow these steps:
- • Visit the “Product List” page in the eZo Admin portal
• Click to “Edit” the product
• Scroll down until the Category list is visible
• Select the relevant Categories for this Product as per the example below:
• Save
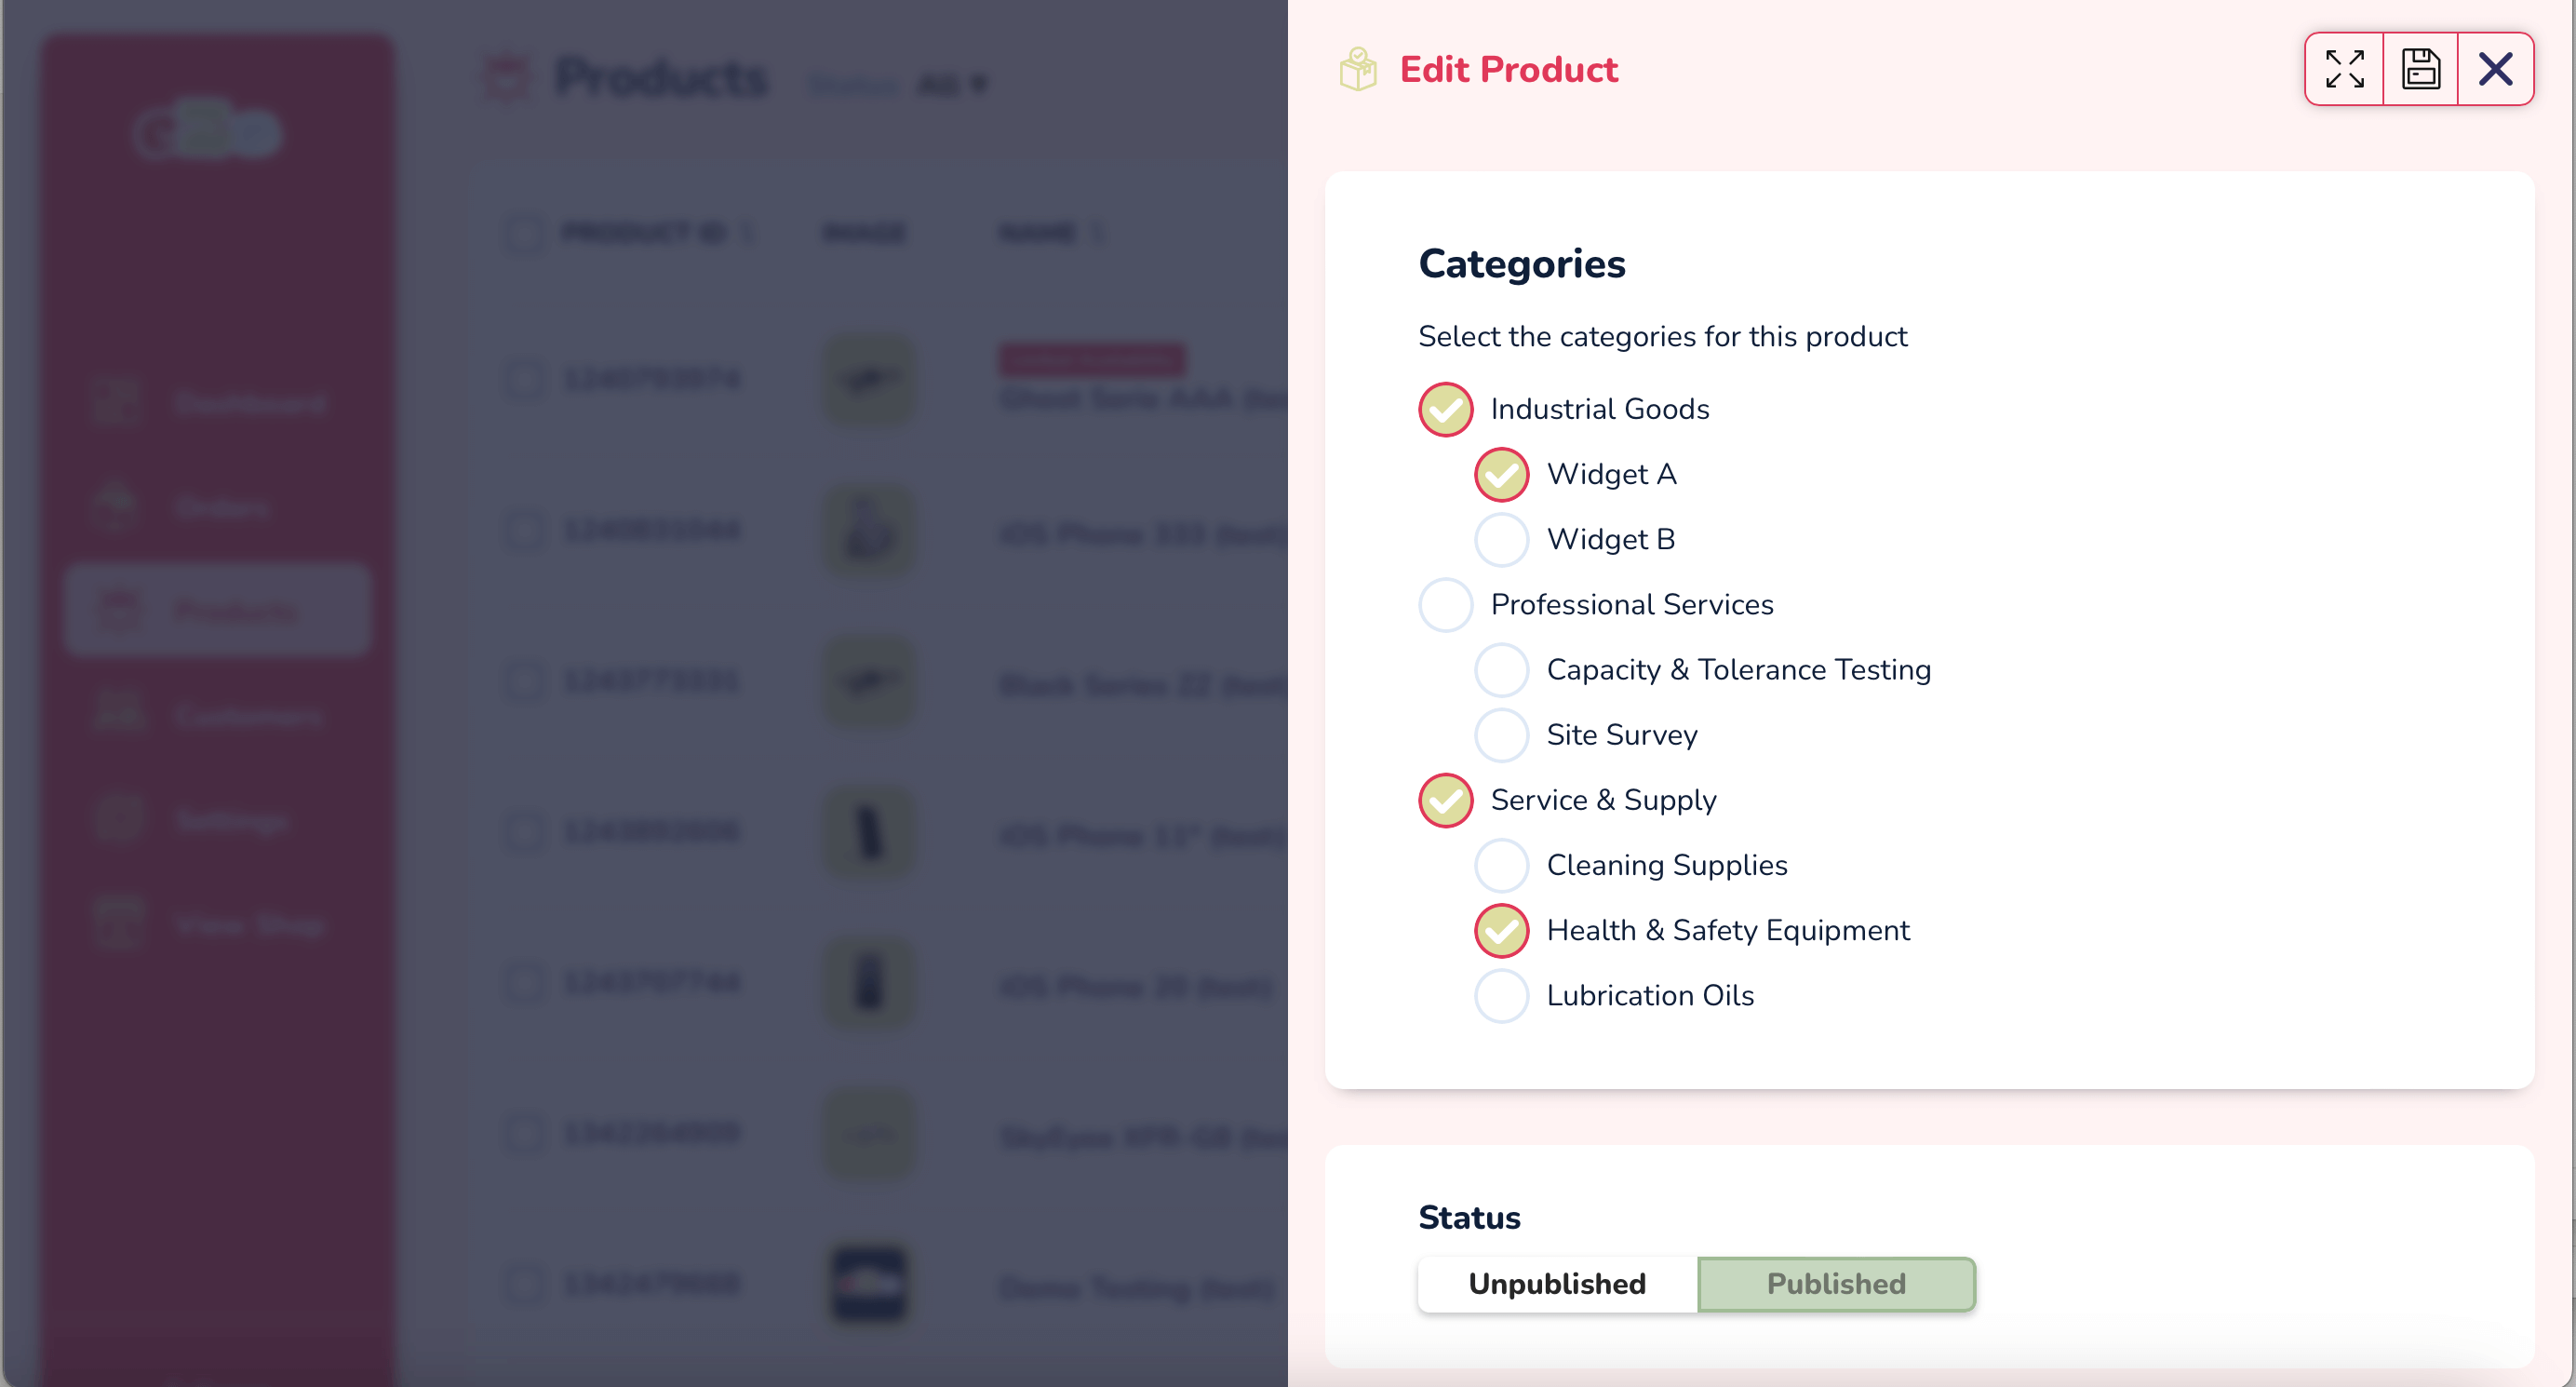
Please note: assigning a product to a Child Category will automatically include it in the parent groups above it. In other words, by clicking on “Widget A” in the example above this product will be automatically included within the “Industrial Goods” category above it.
Assigning Multiple Products
If there are a lot of products in your eZo store it would be extremely inconvenient to have to go through each one individually and assign them to categories. With eZo it is therefore possible to import a CSV file listing all of the products and specifying which categories each product should belong to.
Preparing The Import Spreadsheet
It is essential that time is taken to prepare the import spreadsheet. It is also important to not try and assign categories with the product import tool if the categories have not been set up in advance.
Best practice is to map out which categories each product should belong to in advance and collate this on a spreadsheet so that there is a clear record listing the product / category relationships in your store.
To assist eZo customers in this regard we have prepared a “Product Import” Template which can be found here.
This is the same spreadsheet format which you may have used to import your products previously, however, on this occasion only the “Product Name” and the “Assigned Categories” fields should be used as this import is only ‘Updating’ the products which already exist inside the eZo portal and therefore the other fields do not need to be re-imported.

Completing the Assigned Products Field
One of the key elements to setting up Categories inside eZo is to decide how your store’s category taxonomy is to be set up.
i) Remember to Add Root/ Parent Categories
If a child category exists it is important that the root/ parent categories above it are also included when the details are added to the Import spreadsheet.
Root Category > Child Category > Child Category
For example, if the child category “Widget A” is to be assigned to a particular product then the correct way to specify this on the Import spreadsheet is “Industrial Goods > Widget A” as this tells eZo that this product is assigned to the “Widget A” category which in turn is a member of the “Industrial Goods” category.
If only “Widget A” is added to the spreadsheet the product will not be assigned to this category as eZo will treat this as a Root Category in its own right and as it doesn't exist as a Root Category it would therefore be ignored in this example.
ii) Assigning A Product To Multiple Categories
If a Product is a member of more than one Category group the way to specify this inside the import spreadsheet is to use the pipe symbol “|” to separate both entries.
In this example, the product we are looking at is a member of both the “Widget A” category AND the “Health & Safety Equipment” category. The correct way to specify this in the import spreadsheet is as follows:
Industrial Goods > Widget A | Service & Supply > Health & Safety Equipment
You can continue to add more categories that a product is a member of by continuing to separate each group with the pipe “|” symbol.
Please note: if you specify a category which doesn’t exist, whether this is via a typo or it is a new category, eZo will ignore this and will not create the wrong/new category on the fly.
Uploading
Once the import spreadsheet has been completed and each product has been assigned to its relevant Category group, it is time to import the list. To do this simply click on the Import icon at the top right of the Product List page:
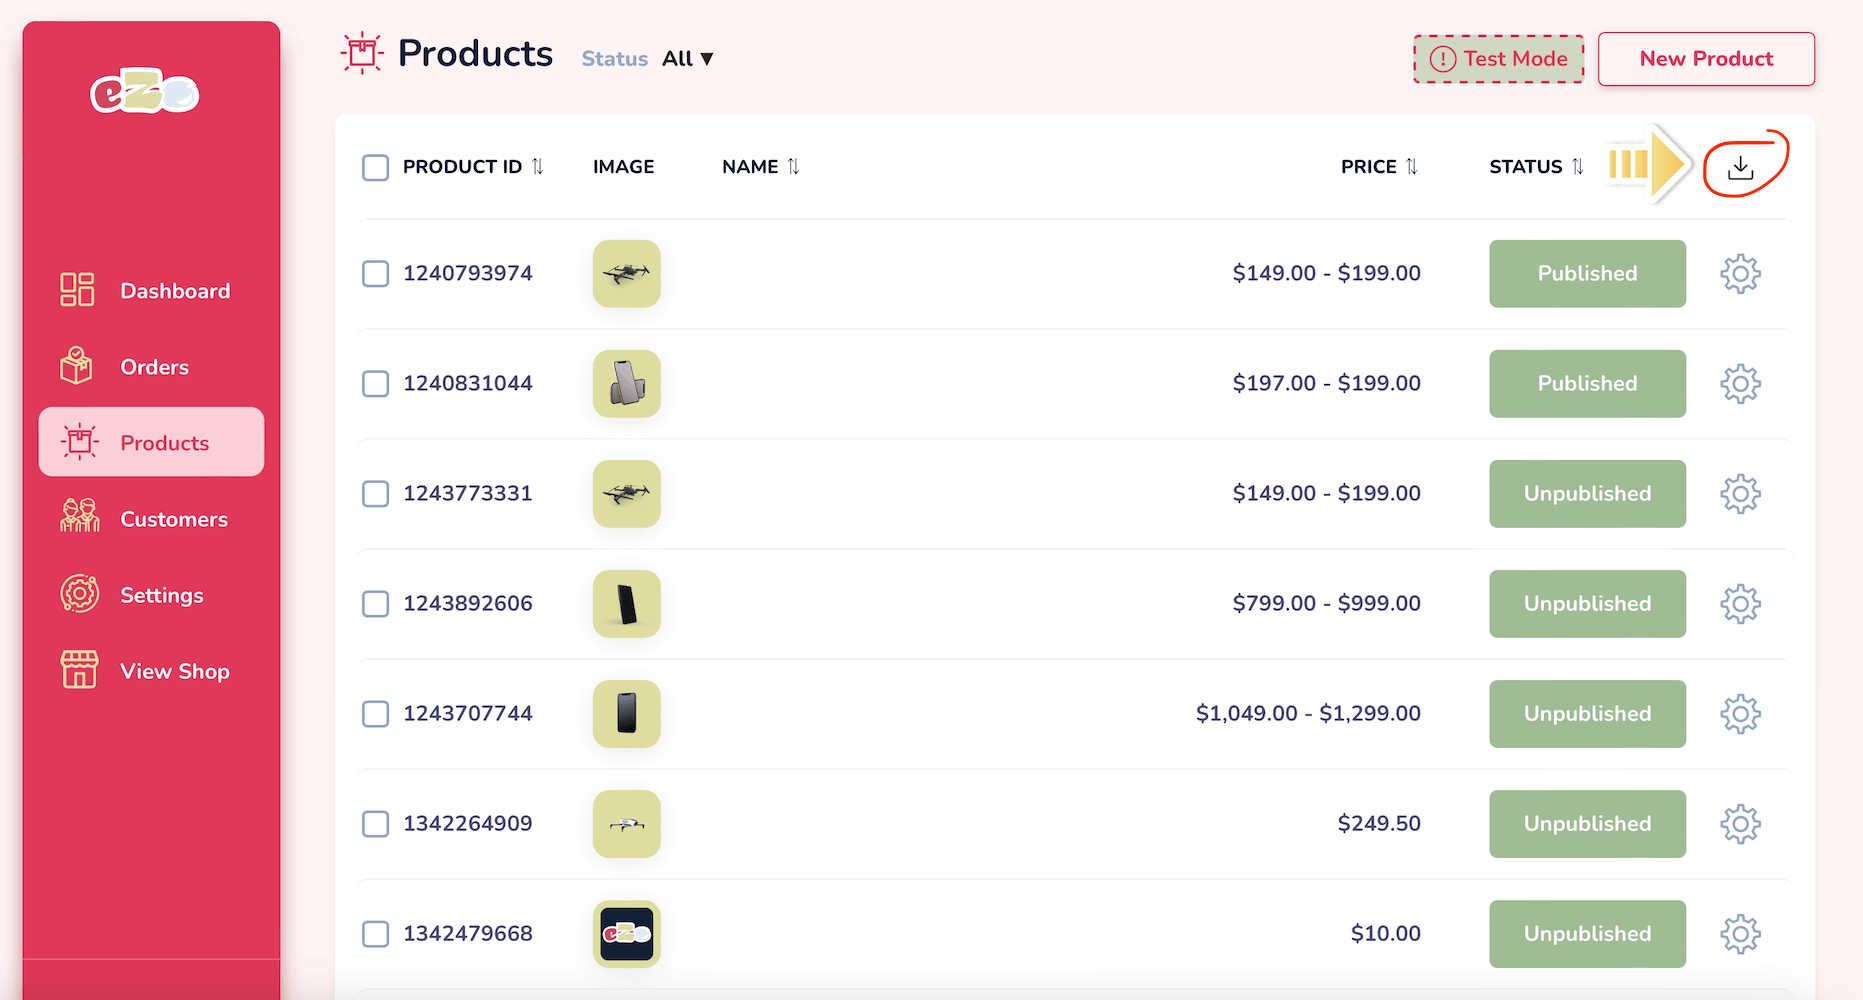
A Popup will appear allowing the CSV file to be uploaded. Click on “Choose File”, select the relevant CSV file from your computer and then click on the Import button for the file to be uploaded into eZo.

NB: as per importing a list of products into eZo, there may be a slight delay as we wait for the HubSpot API to respond.
We hope you find eZo's Category tools useful to keep your store’s category taxonomy accurate and up to date. The key to success is to plan your categories in advance and to keep clear records on what Products are assigned to which Categories and when each upload has been made. It can be very easy to get confused without clear records.
We also hope you have found this guide helpful. If you have any questions, please do not hesitate to reach out to the support team.